Spriting 101 - Spriting Basics and Troubleshooting
So you've visited the Spriter's Challenge section, but you weren't sure
what to make of it. What are sprites, and how do people make them? How
can I be a part of the Challenge? Where do you start?
A sprite is a game graphic done with individual pixels. Games that don't
use 3D polygons do all character design in sprites. All early games were
done this way - GB games also use sprites. There are number of excellent
sites that provide sprite resources for webcomics and spriters - probably
the most comprehensive is The
Spriter's Resource.
When you enter a contest like the Spriter's
Challenge, you are asked to create a sprite for your entry - this
means you must have a clean image with pixel-by-pixel editing. There are
many ways to make your own sprite, depending on what the contest asks
for. Be sure to read the rules carefully.
Here are some definitions and examples of spriting techniques:

Recolors are simply changing the colors on a sprite (almost like shiny
Pokemon) - for example, making a green Pikachu. Chokoneko is a recolor
- she's still completely Delcatty, but her colors are changed to make
her look like chocolate. Recolors usually don't do very well in contests
because not much has been changed.
 
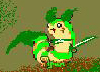
Splices are made by adding parts of one Pokemon to another. These are
the most numerous sprites in existence. Vengeance is a mix between Ninetales
and Absol, while Kittysune is a Skitty/Vulpix combo. There are many of
these in my Sprite Gallery.
 
Decolor means taking Advanced sprites and making them look like R/B sprites,
using only four total colors. These are useful in making joke screenshots
for R/B. You can read a full tutorial on Decolors and fake screenshots
in Lesson 3.
 
Scratch spriting means making accessories (or the entire sprite) yourself
without using anything as the base. Royal Nidoqueen's dress and crown
are scratch-sprited, as are the changes to her face. NyQuil's bottle is
scratch-sprited.
 
Elemental means taking a Pokemon and changing its colors and details as
though it were a different elemental type. Notice how Fiera and Frozeli
are both based on Mew, yet they look competely different because of their
coloring and details.
 
Morphs are made by combining elements of a Pokemon with a trainer. There
are several different ways to do these.
 
R/B/Y recolors (or G/S/C recolors) are done by taking an older sprite
and redoing it to FR/LG coloring and shading standards. You will usually
need to add new colors and lots of shading to make an old sprite look
like a newer one.


The most advanced sprites are made by taking an existing sprite and completely
redoing it into a different character. For these trainer sprites, you
shouldn't be able to easily recognize which trainer was used as the starting
point. You may wind up taking parts of different trainers to make the
final character, but the finished sprite should look balanced with good
proportions, and look like the character you're trying to represent. Many
people use this technique for their own personal trainer sprites. This
was the basis of Spriter's Challenge #8.
When you begin spriting, you must remember to draw one pixel at a time.
If you color over a sprite in Paint, for example, you have not made a
finished sprite. Your work should look clean and sharp. You should be
able to see individual pixels when you zoom in. Be warned that spriting
takes a lot of time, patience, and practice. You will not get good at
spriting overnight. For some tips, read the critiques provided in the
bi-weekly Spriter's Challenges. You will often notice that the most highly
detailed sprites place higher than plain sprites. You will also notice
that low-rated sprites have major errors like sloppy outlines, no shading,
or pixels out of place.
These are sprites.
All coloring, outlining, and shading is done with individual pixels,
as if it were an actual game graphic. There are no "fuzzy"
outlines.
| 
 

|
This is not a sprite.
Even though a Furret sprite was used as the base, you can't see the
individual pixels. It looks "fuzzy".
| 
|
Troubleshooting Tips:
Q: My sprite looks like garbage when I save it, but it was fine before.
What happened?
A: MS Paint is terrible for distorting images and adding JPG artifacts
(those little blocks of not-quite-the-same-color pixels). You should try
saving in GIF or 24-bit BMP - these don't lose any quality at all (though
with GIF you sometimes lose some colors - see below). If you're using
a nicer program like Photoshop, make sure your JPG quality is 80 or higher.
If your sprite contains JPG artifacts, it will not be judged because it
is nearly impossible to determine your intended shading and outlines.
|
500% Zoom
|
 |
 |
|
JPG Artifacts
|
No JPG Artifacts
|
Q: There was no background when I created my sprite, but a white one
appeared when I saved. What's up with that?
A: Only certain file types will save transparency. The most common of
these include GIF and PNG. File types like JPG and BMP add a white background
because they don't support transparent images. I have no problems with
white backgrounds on your sprite - it can help your entry stand out from
the black background of this site.
Q: I saved as a GIF to get a transparent background, and now my colors
look different. Why?
A: GIF files can have, at max, 256 colors. In nicer graphics programs,
you can choose the type of palette - adaptive means that it uses only
256 colors that are in your image (you probably will notice very little
change from your original). Restrictive uses only web colors, and will
probably distort your original idea. If possible, use PNG-24 instead -
it doesn't have a limit to number of colors. If you do use a transparent
background, you can't have transparency errors (extra pixels or holes
in the sprite). When in doubt, don't do transparency.
Q: What if I add extras to my sprite like custom backgrounds and animation?
A: Backgrounds/Animations may gain you some extra points if they're done
well, but will definitely lose you some points if they're done poorly.
When I judge these Challenges, I'm looking at the sprite itself more than
anything else. Fancy backgrounds won't make up for a sloppy sprite, but
they can show off an excellent sprite. You should always submit the sprite
plain (with either a transparent or white background), and attach a second
file with the background. Animations can be tricky, and if they look choppy,
you will lose points (even if your original sprite was good). When in
doubt, just submit the sprite alone - extras aren't necessary for high
grades.
However, if you create an excellent sprite (C+ or higher) that does have
extras, you are more likely to get one of the top three awards because
you put extra effort into your sprite.
Q: R/B/Y recolors - that just means I should put Advanced colors on old
sprites, right?
A: Not quite. You can start a recolor by just adding Advanced colors,
but your sprite will look weird. Take a look at the Yellow version Eevee
below.
 
The first Eevee is the original sprite. The second sprite was made by
adding Ruby/Sapphire Eevee colors to the Yellow sprite. Notice how some
of the outlines stick out, and the shading looks flat?

The third Eevee used the 2nd as a base, but added a lot more shading
and more authentic Advanced outlines to the sprite. Notice how much more
depth it has? You will not get nice recolored sprites if you simply swap
out colors.
Need some inspiration? Check out my Art Museum's Sprite
Gallery.
There is an excellent tutorial that can be found here: Butterfree's
Guide to Sprite Editing.
Now that you've learned the basics, why don't you practice
for real? Move on to Lesson 1 for step-by-step instructions on the most
popular sprite edit: basic splices.
Lesson 1: Basic Splices
BACK to Articles
BACK to TR's Rockin!
|