Princess Peach Costume - Part 2
July 4th weekend: Began sewing the skirt - had to purchase an extra yard of the dark pink fabric. I now have most of the light and dark pink pieces sewn together, and it looks so neat. Picked up an Elizabethan royal dress pattern (on sale for $2) that has a square-neck bodice I hope to modify - I got some cheapy fabric to make a sample one before I make the real thing. I'm going to try for a high scoop neck edged with pink lace (to get the scalloped neckline). If only Peach wasn't quite so conservative, this would be a lot easier.
I got a pair of clear hair combs that I hope to use with the crown. Much like tiaras I've owned, I'd like to attach these to the bottom of the crown so I can wear it easily. I may need to dremel some holes in the metal and use floral wire to secure the combs. I found huge (2 1/2 ") aqua flat marbles for Peach's necklace. You can find these here: WholesalersUSA, Inc.
Week of July 5: I started sewing the skirt. Not much more to say.
I got almost the entire skirt finished except for the waistband. The pattern's "continuous lap" took some figuring out, but I think I did it right. In any case, that part's done now. July 8-10: The skirt's nearly done. I decided to change the original pattern a little - instead of making the back with eyelets and laces, I decided to make the waistband/belt longer and use Velcro. So far, it seems like it'll work just fine. I also decided against double-layering the waistband to make it narrower - instead, I'm just going to finish off the raw edges and leave it wider. This should look better for the character, too.
July 12: I finished up the skirt last night, and it couldn't be better. I changed the original pattern a little (eliminating the eyelets and laces, replacing them with Velcro strips). I also used Fabri-Tac instead of sewing to finish the edges - I wanted as few extra seams on the skirt as possible. My modifications seem to have turned out fine. I started looking through my bodice pattern, however, and it looks to be beyond my sewing scope. As a "historical" costume, it has lots of specific details that I don't really need (like bone strips in the front to hold the shape - ouch!). It seems very complex, so I'm going to try simplifying it. If that doesn't work, perhaps I'll wind up using the bridesmaid "puffy sleeves" dress pattern after all (I just need to get one in my own size). The marbles should arrive today, so I will be able to get started on my "jewelry".
July 13: The jewels arrived last night, and they're absolutely perfect - and not a single stone was chipped or broken. My stones are a little more round than I had really wanted, but they'll do just fine. I got to work making the large necklace using half a block of Fimo clay (being very careful to not leave any fingerprints in the clay). I set two small jump rings into the clay at the top of the "setting" and put it in the oven to bake. The necklace came out well, although it's very heavy. Luckily, the Magic Stretch cord I got is stronger than it looks. Now that I'm looking at these, however, I'm wondering if I should re-think the earrings. I happen to have some smaller gemstones that are the exact same color as the necklace, purchased years ago at a World of Values (I had been using them for everything from Ren Faire gifts for kids, to room decorations, to Pokemon TCG damage counters). I also happen to have earring backs and a glue gun. They'd be smaller than the earrings I already have (and need to repaint), but they'd match perfectly. Hmm.
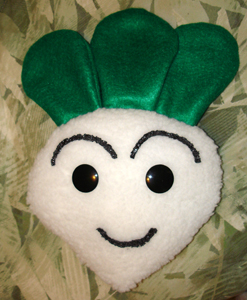
July 18: I added the face to my Veggie yesterday. The fabric paint wasn't easy to use on the textured fuzzy surface, but I got the face on there without much difficulty. Veggie is now complete.
July 25: I spent several hours yesterday working on my crown. Using my dremel, I cut the out the four-pointed shape of the crown, and punched two small holes on either side of the base. I used some gold-colored "spool wire" and attached clear hair combs to the base at an angle. But when I placed it on my head, the combs didn't hold. I was able to jimmy-rig the crown to my head by using hair clips over the combs (along with some of my hair) and that seemed to hold. I was even able to practice DDR for a few rounds without the crown coming loose. I've learned that if I do DDR at a convention, I can't wear my giant necklace (it's too heavy and flops around a lot). I'll have to wear my original necklace as a "spare" for dancing.
BACK to Cosplay Princess Peach Princess Toadstool cosplay costume san diego comic-con luigi mario super mario bros. el paso anime convention nintendo power super show princess peach |
 TR Rose's Cosplay Journal