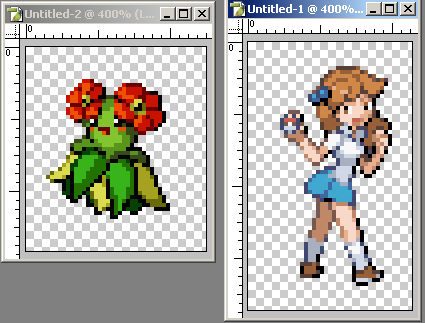
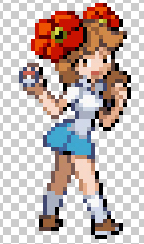
Spriting 101 - Lesson 2 - All About ShadingWelcome back, spriters! As you may have noticed from the Spriter's Challenge entries, shading is a very important factor in making a good sprite. Shading must look natural on a sprite, and all light must be coming from the same direction. Often, good entries will lose points because either the shading doesn't match, or the shading is wrong. This lesson will show you some tips for making your shading look consistent. Usually shading issues happen when you're using parts from Pokemon who are facing different directions. This is especially a problem when you need to flip parts of a sprite to make them fit the second sprite. For this example, we're going to add details from a Bellossom to a Lass. You'll find that many of these shading issues come into play when making morphs.
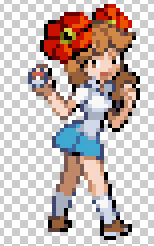
You remember how to make splices from Lesson 1. But look what happens when we put the flowers on Lass's head.
Notice that the light seems to be coming from the left side on Lass (look at her face), but the light on the flowers is coming from the right. The horrors! Luckily, we can fix this without much trouble. Starting with the outlines, copy the colors from one side of the sprite to the other. You will need to take samples from the original Bellossom from time to time. Since the left flower is in front, we'll be using the shading style of the right flower for this one. We'll try to copy the same shading patterns to the opposite flowers. It's useful to put your new shading on a separate layer so you can see what you started with.
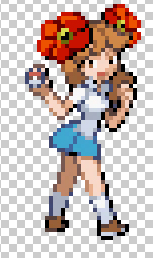
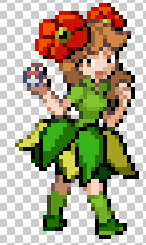
Do you see how I changed the front flower? I took the shading style of the left flower from the original Bellossom, and used that for the Lass left flower. I added a black outline to the "back" side because it's in shadow. You can then change the right flower by using the same technique.
Do you see how the shading on Lass now resembles (but isn't identical to) Bellossom's shading? Now it looks like all the light is coming from the same direction. But something else is strange now - there are no shadows under these flowers! Adding one is simple. Just use the shading colors on Lass's hair to create a shadow under the flowers where light would cast one. Be sure not to change Lass's original highlights - just add some extra shadow under the flower.
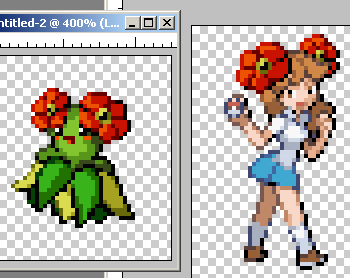
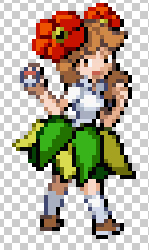
Now when we add Bellossom's skirt to Lass, we don't need to change shading because the angle is already correct. The light is coming from the top left, just as it is on Lass. But we have a different problem to fix here.
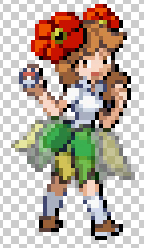
The leaves are overtop the elbows! How to fix this mess? The answer: reduce layer opacity on the skirt. When you reduce to opacity to about 70%, you'll start to see parts underneath. Where you see the elbows underneath, just erase the skirt, pixel by pixel, until they're uncovered.
Add a little recoloring to finish it off, and you're done! Say hello to Flower Pixie Lass! Until next time, good luck and happy spriting!
Lesson 3: Decolors and Fake Screenshots BACK to Articles |