 Becoming
Raichu Becoming
Raichu
How I put together my first Pokemon cosplay
outfit, Step by Step
Longtime visitors to this site will know that I've been
doing cosplay for quite some time (since the Pittsburgh Comicon 2001,
to be exact). I've put together a few outfits, but nothing really challenging.
I was always dressing as human characters, and aside from some interesting
experiments with anime hairstyles, I didn't have too many problems.
My creativity was going to be pushed to the test with my
next project, however: I was going to be a Raichu! My husband had gotten
custom Army patches for his Lt. Surge outfit so he would look authentic.
But to a non-Pokemon fan, would anyone even realize who he was supposed
to be? Not without his Raichu! So this was the task ahead of me. I have
about a month to complete the Raichu outfit. Here we go.
Goal:

5/1/05:
Finally began working on the outfit. I had purchased a golden-colored
velvet leotard online to serve as the base for the main outfit, but I
haven't done anything on it yet. I hope to order some stretch velvet fabric
in white and either gray or dark brown to make the costume details - white
for the belly, and the darker color for the back stripes, paws, and feet.
The sewing machine we bought a few weeks ago hasn't been used yet due
to lack of work space. Hopefully this will be resolved later this week.
My original plan is to make some kind of leg warmers for my legs and arms,
and connect them to the paws (which I don't know how I'll do).
Started to work on the ears, probably the most important
part of the outfit. Following a suggestion I found online, I plan to use
a plastic sun visor turned upright like a headband. I will cut the visor
into stick-like ear supports (with a hook on the end to hold them in place)
and put the foam ears on top. The foam should be lightweight enough to
stand up and hold its shape. I purchased yellow spray fabric paint for
the base ear color, and gray fabric paint for the details. I have some
black pipe cleaners that I will use to make Raichu's ear spirals.
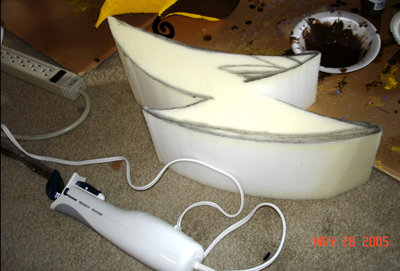
With my new Emerald Version strategy guide and a small plush
Raichu as references, I created a rough pattern for a Raichu ear. Using
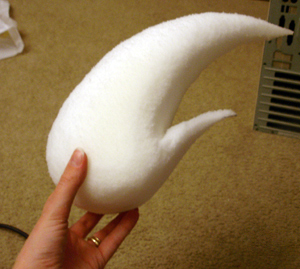
an electric kitchen knife, I cut two ears out of my foam. I began to give
the first one a rounder, more dimensional shape which really helped it
take form. Reminds me of my work in 3D computer graphics. Lots of chiseling
to make these things look right, and they're still very 'blocky'. I'm
going to try sanding them down with sandpaper and/or the Dremel.

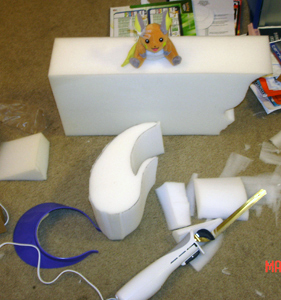
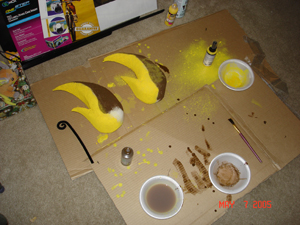
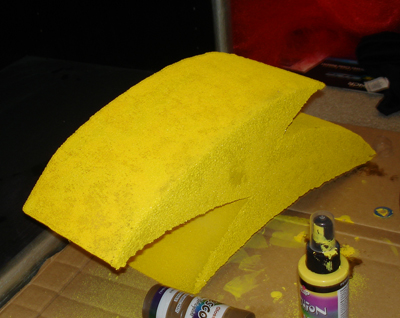
Starting out - a block of foam, an ear pattern, and reference materials.
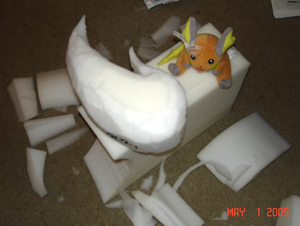
The first ear. It doesn't look like much.
I start smoothing the ear with the electric knife.
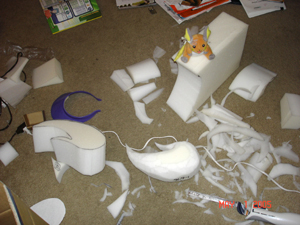
The end of the first day.
5/3/05:
Began to work on sanding down the first ear. I learned that
regular sandpaper blocks work great to smooth the foam, however steel
wool does not. After picking steel wool fibers out of my foam, I had to
go back and re-sand that part anyway. The sandpaper helped get rid of
the blocky look in the foam, but also started to make the foam look "fuzzy".
I don't think this will be a problem once I start painting.
By the time I'd finished the first ear, foam was everywhere:
in my hair, on my face, in my mouth, down my shirt, coating my hands,
and all over my clothes. What a mess.
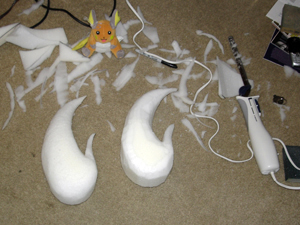
I electric knifed the second ear and began sanding it down.
I'll need to pick up some smoother sandpaper to finish these off. The
ears aren't identical, but you won't be seeing them both from the same
angle once I put them on the headband. I think they'll look better once
they're painted.
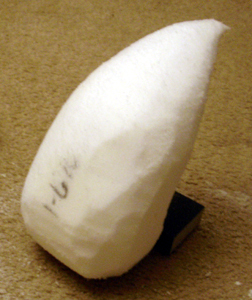
The left side is smoothed, the right side is not.
You can see the difference the sandpaper makes.
Smoothed with coarse (60 grit) sandpaper
The end of the second day.
5/6-7:
Finished up smoothing the ears and began to paint them.
I will be taking a break from Raichu for a few days until I finish my
Princess Leia costume (since I only have a week left to finish that one).
The ears are nearly done now, but I'll need to fix some places where the
brown paint started to drip into the yellow.
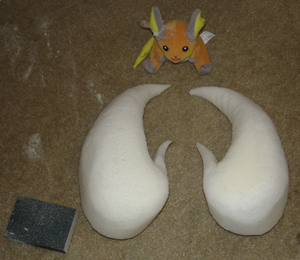
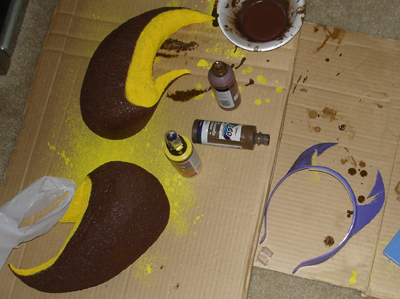
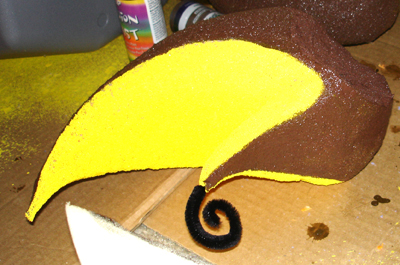
The ears are completely smooth

See that yellow spray fabric paint? Waste of money.
The sprayer never worked properly, so I had to hand-paint everything.
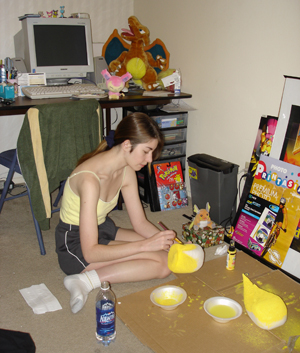
Here's me painting the yellow on the 2nd ear in the "computer room".
Started work on the brown parts, but the yellow is hard to cover.
You can see the 'springy' part of Raichu's ear here.
5/25/05:
I spent all weekend finishing painting the ears and beginning
to construct the headband, much to no avail. The second bottle of brown
paint didn't match the first, so I had to repaint both ears with the new
brown, and I had to change the original shape of the brown/yellow spots.
Lots of repainting happened.
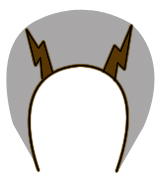
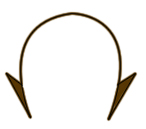
I tried to use the technique of "kitty ears" to
dremel a plastic sun visor into points, planning to stick the ears on
top. The finished visor looked something like the drawing below (the gray
part was the original visor). The jagged parts were supposed to securely
hold the foam and keep it from moving. I painted the visor with brown
Fusion spray paint and thought I was nearly done. Boy was I wrong.
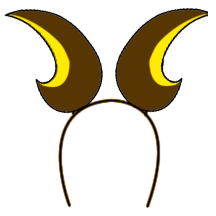
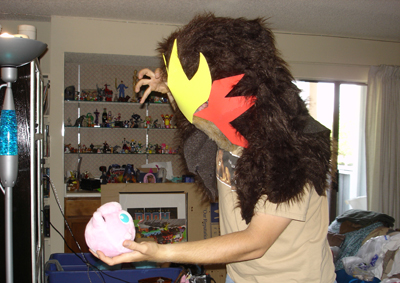
But when I stuck the ears on (after several cuts trying
to get them at the correct angle and even on both sides), I was disappointed.
The ears looked more like horns than ears and they looked far too huge.
They certainly didn't look like Raichu ears.
This wasn't going to work - so it looked like I had to cut
another visor somehow and start over. The ears would need to be about
even with my eyes and real ears. Puzzling over this for awhile, Concolor
and I finally came up with this pattern for the headband.
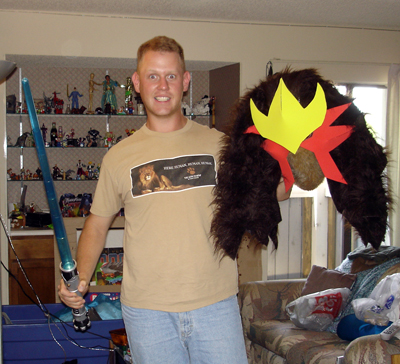
But when we stuck the ears on, they stuck out at a bad angle.
They didn't look like ears at all - heck, they didn't even look attached
to my head. Plus they were wobbly and felt unstable. I had trouble walking
through doorways. The headband didn't want to stay on my head either.
What now?

Concolor suggested I try to fit them to my head more by
cutting part out of the base that would go next to my head. This was going
to be risky. If I did this wrong, I would have to start over from the
very beginning on these stupid ears.

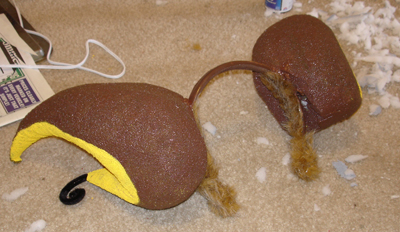
Although you can't tell from this drawing, the ears worked
much better like this. I didn't ruin them, and now they actually looked
like they were coming out of my head. Now I have to spray paint the new
headband and glue these bad boys in place. I also need to add the curly
bits to the bottom points of the ears. Additionally, I think I'm going
to glue some fur to the bottom points of the headband so it doesn't hurt
my head.
It finally looks like I'm getting somewhere, but there's
still much to go and not much time in which to do it. Tonight (hopefully)
I'll start on making the sleeves and hands/paws. Of course, I've been
saying that for weeks. With the convention a little over a week away,
can I do this? Can I actually get the Raichu costume off the ground in
time? We'll find out...
Memorial Day Weekend:
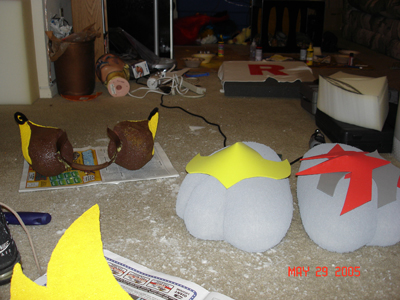
Finally started to make significant progress on the outfit.
The ear with the rounded notch and the springy bit.
The Raichu tail cut out of foam. I decided to leave it thick for stability
when attached to costume.
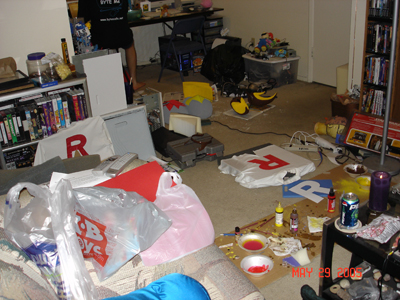
The living room on Sunday. We've got about five projects going on at once
around here.
Got foam?
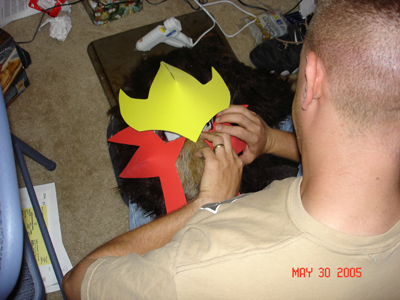
Concolor works on gluing a new face for Entei that actually fits the 'head'
better.
A hot glue gun solved many of our adhesive difficulties.
Ears bonded to headband with Elmer's Ultimate Glue.
Pros: bonds anything to anything and is nearly indestructable.
Cons: Drips, dries slowly, and looks like snot when dry. Ick.
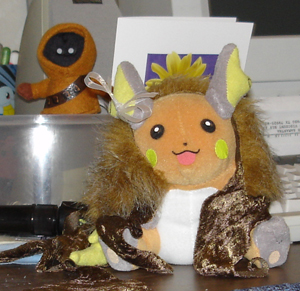
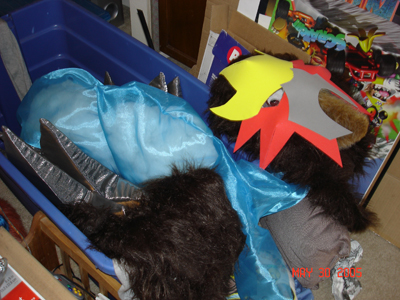
Pimpin' Raichu hangs out with a Jawa.
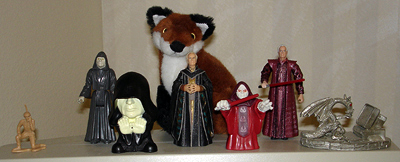
Concolor's monitor - a study in Palpatine
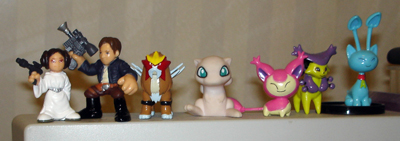
My monitor - chibis and kitties (can you tell we're getting burned out
by this point?)
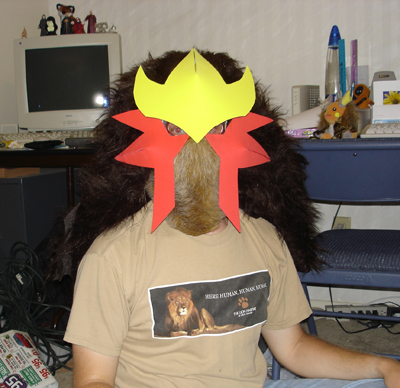
The new Entei mask (without the gray part)
Entei vs. Jigglypuff
Now we're just getting silly. "Bring me the head of Entei!"
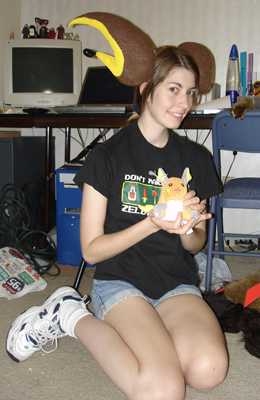
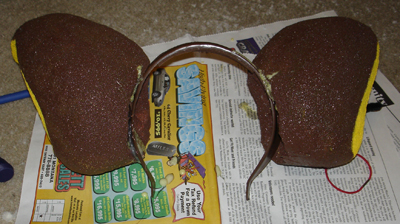
Finally the ears look decent and they're staying in place. At last.
I hot-glued fur to the headband to make a tighter fit and to keep the
plastic from digging into my head.
They fit much nicer now and don't flop around as much.
The 'Chu tail painted. It looks like a block of cheese, I know.
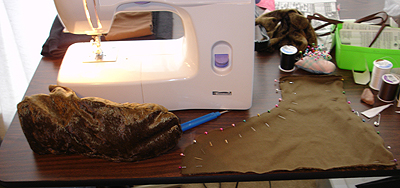
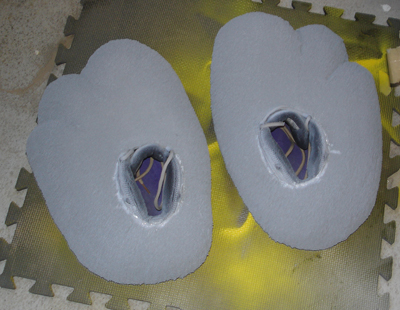
Raichu feet. On the right, the foot ready to be sewn. On the left, the
sewn foot hot-glued around a canvas shoe.
Box o' Entei
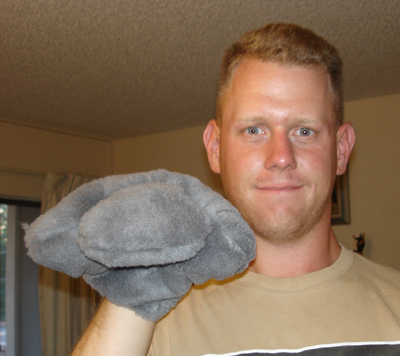
Entei's new paws - layers of fur and quilt batting. They look much nicer
than the old version.
Entei feet - sculpted foam hollowed out with shoes glued inside. Again,
better than the old floppy feet.
The 11th Hour: June 1
With only hours before we had to leave for the convention,
there were still things to be done on Raichu. Luckily, I'd decided against
the sleeves and decided to focus on the legwarmers. Good thing, because
I just barely had enough elastic for the legwarmers. Making the sleeves
would have meant a late-night Wal-Mart trip. I added an extra strip of
Velcro, vertically between the existing pieces, and Concolor helped me
sew and glue the top two corners of the tail to the outfit. It'll make
it a bit difficult when I need to wash 'Chu, but we can always sew and
reglue.
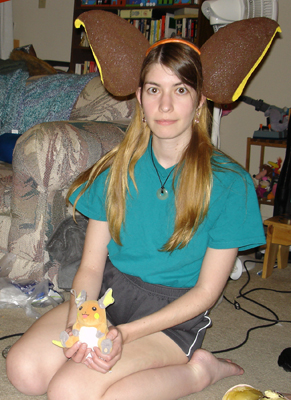
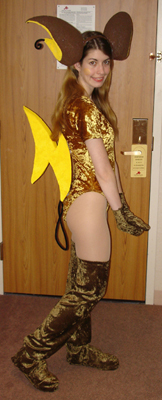
The Convention:
Raichu went over extremely well, and many fanboys took pictures.
The ears stayed on for the most part, and only began to hurt after wearing
them for about 5 hours straight. The tail ripped on one side, but hot
glue took care of that problem. I didn't win anything, but I did have
fun wearing the costume. I also got to hear what I believe is the best
compliment you can receive from a fanboy: "That's the hottest Raichu
I've ever seen!"
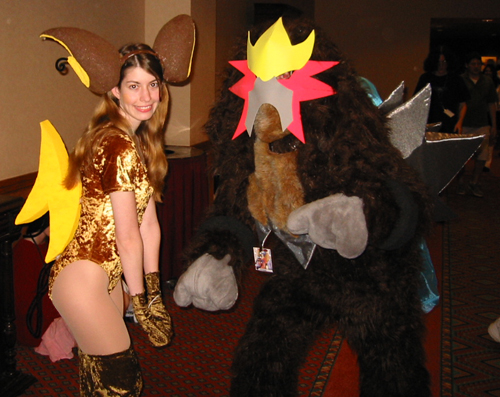
Picture from http://trunkins3.homestead.com/Friday16.html
BACK
to Articles
BACK to Cosplay
|