Alchemist Uniform Tutorial - JacketWritten by Concolor (Lee Nader) McCalls Pattern 4745: Civil War Welcome to the Make Your Own State Alchemist Tutorial. But “Why would I make an Alchemist costume?” you ask. Well, several reasons. One, the pride and warm fuzzy that can only be got from doing it yourself. Two, it can be cheaper than buying one. But not always. Three, you can tailor it to fit your body. You can make it fit you perfectly, and you can adjust it to look more like the anime characters. Read Through All These Instructions Before Starting! I don’t really go in any sort of order!
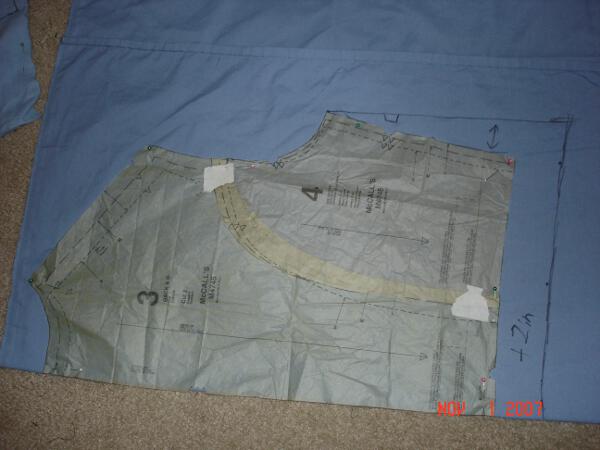
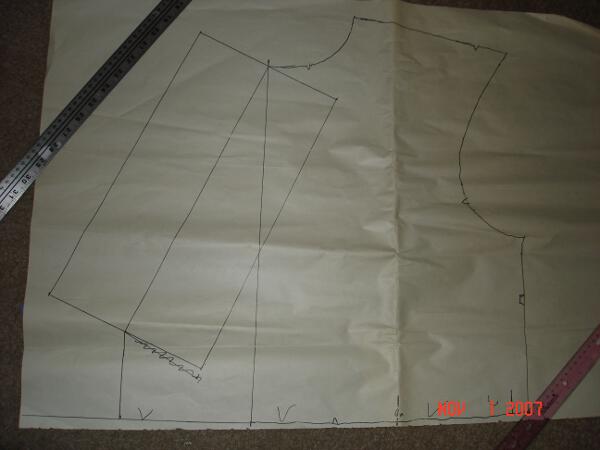
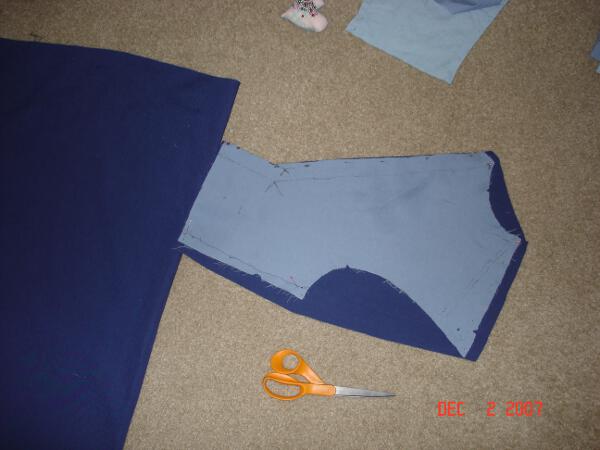
Fig 01: Figure 01 shows how I began to use the McCalls Pattern #4745 : Civil War Pattern as a basic start. By doing this, I could match the arm hole seams and basic sizing. Since the Alchemist top fits really loosely, I added to the very trim fitting pattern. Also notice that I'm making it out of bedsheets. This is called a “muslin”. Get used to making these. I made at least three different versions of this part alone. This is how you do the tailoring: make one, try it on, see what needs fixin, make it again. I also taped two pattern pieces together. No, they don't fit exactly. It doesn’t really matter. This is the back.
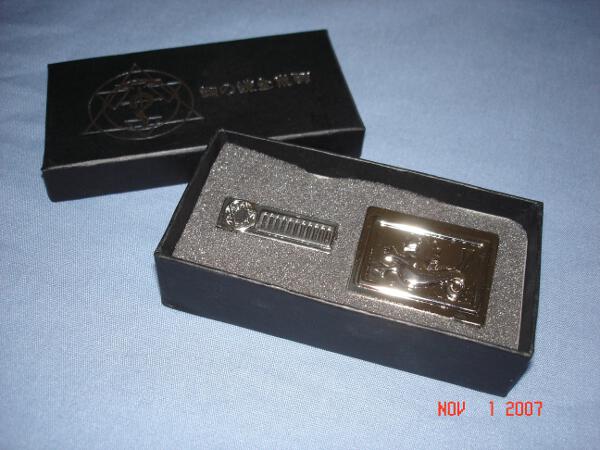
Fig 02: I bought the collar pins from eBay. Yeah, I know. After all I said about making it yourself. Well, there is no cost-effective way for me to make this part better than this. I suppose you could resin-cast these. But I really wanted metal, and metalworking is beyond my scope / price-range.
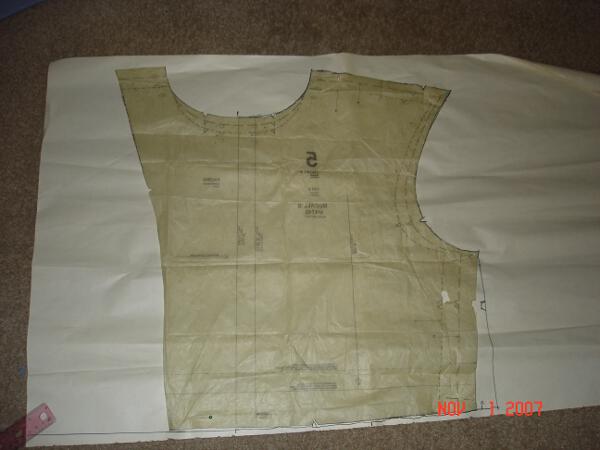
Fig 03: This is one of the front pieces. The front is a pain in the... well, you'll see. I made a second, paper pattern. Since that chest rectangle is pretty specific looking, I wanted to get it right.
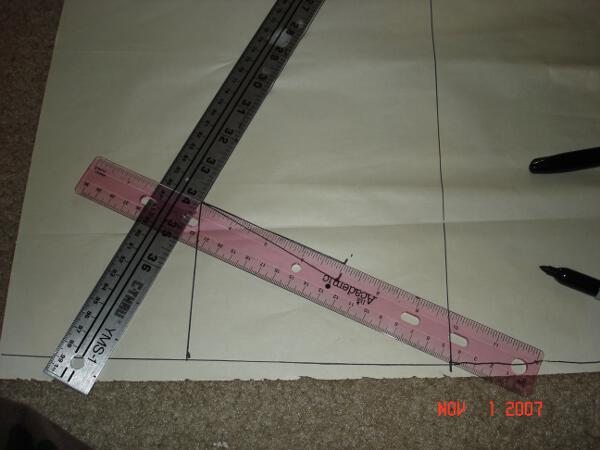
Fig 04: At this point, I started to figure out the front flap. My wife actually took a picture of one of the characters (one of the bigger ones, Basque I think. You’d pick a character closer to your size / gender), and used it to figure out the proportions to my size (Unlucky for you females with a larger bust, you will be sewing darts in your top. I have no advice here...beyond my experience range :3). Basically she took the picture, and re-sized it to me, life size. Using the rulers in Your Favorite Photo Editing Software, she ‘re-sized’ Basque Grand until he stood 6ft 2in tall. My height. With that match, we were able to use the built in rulers to figure out how long / wide the front rectangle should be (among other things). You don’t have to be exact (this is art, after all), but it gives you a good starting place. Using those measurements, and basing everything off of a center line, I began to draw.
Fig 05: This is my first pattern. I would soon find out that the rectangle “just didn't look right”. I wound up making it thicker. You can measure until you’re heart’s content, but if it’s “wrong”, it’s “wrong”. This is why doing a (or several) mock-up(s) first helps.
Fig 19: Skipping ahead...or behind, I don't know. This is how I began to make my “bias” tape (not cut on the bias, I know. Actually cutting it on the bias {diagonally} would have added a bunch o seams, and a bunch more of strips of varying size).
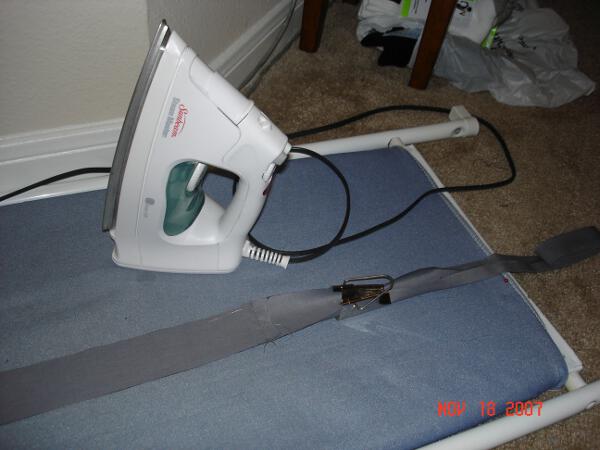
Fig 20: The device on the right is a bias-tape maker. You could probably do this bit by hand (iron length-wise, fold over the ends...) but it's much easier (and more even) to use the bias tape maker. It -does- take a bit of practice to get the hang of it. Try it on scraps first. It's deceptively simple: cut a piece of fabric 2inches wide, slip the end through the maker, pin one end to the ironing board, and as you drag it along, it folds the fabric automatically. Run the iron along right behind it: voila; instant bias tape.... Make no mistake, I spent a lot of time cursing at this point.
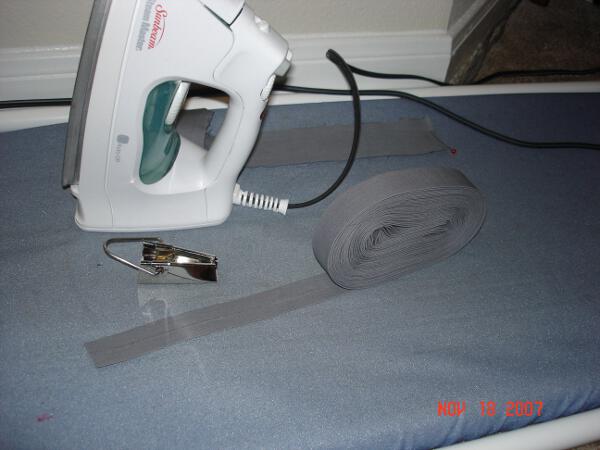
Fig 21: My Beautiful Katama... er... roll of 'bias' tape. I rolled it up so that as it cooled off it kept its shape better.
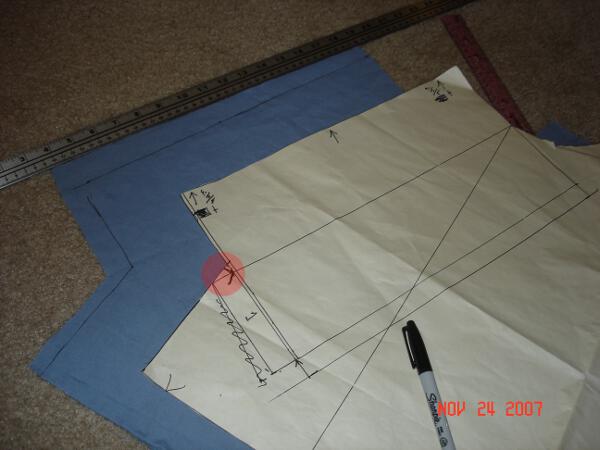
Fig 22:Okay, back to the front panel. This is what wound up becoming the final product. The adjustment can be seen at the bottom of the rectangle, and along the right side. I drew it up one inch from the bottom, and made it one inch wider on the right side. Notice the area under the 'light-red' circle. This is what changes when you resize the rectangle. You can't just resize it 'in place'. I've seen many people do this, and it makes their chest rectangle look 'weird', or 'off somehow'. My advice, when you resize the rectangle, resize the rectangle as a separate piece of paper. Then use that piece, and see where it matches up with your front panel. It will make more sense if you work it out on paper first.
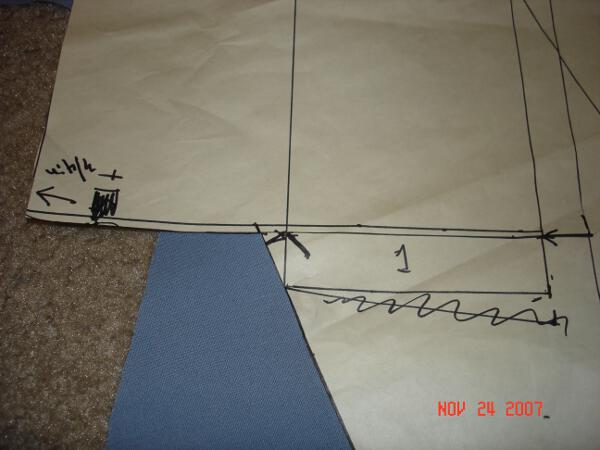
Fig 23: Just another view of how I had to extend this vertical line due to the rectangle's resizing.
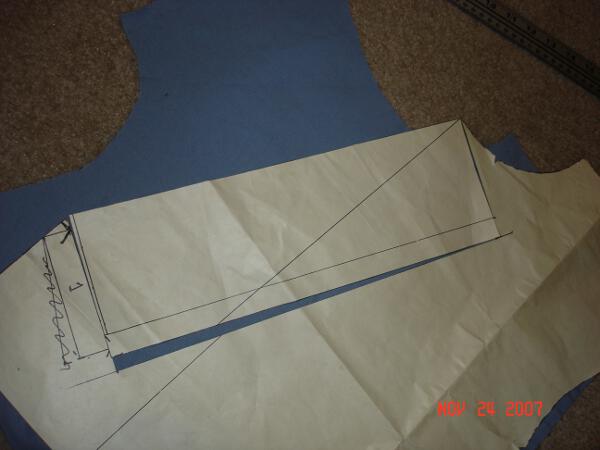
Fig 24: Another line that had to change in order for the rectangle to stay a rectangle.
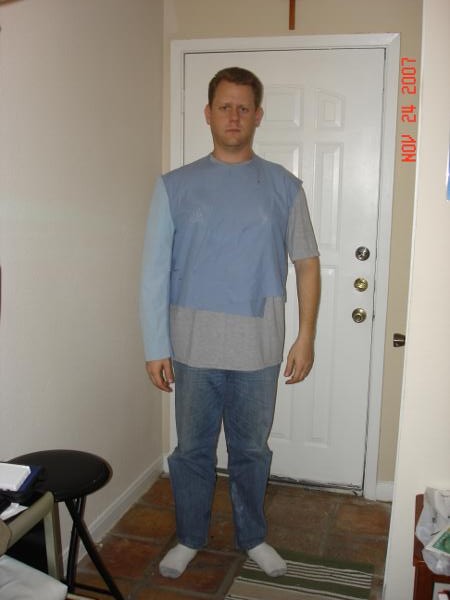
Fig 25: The first test fitting with the standard arm pattern that came with the Civil War pattern. The only changes I made were to add an inch or so to the seams running the length of the arm. I tapered it in at the top (point where the arm attaches to the chest/back).
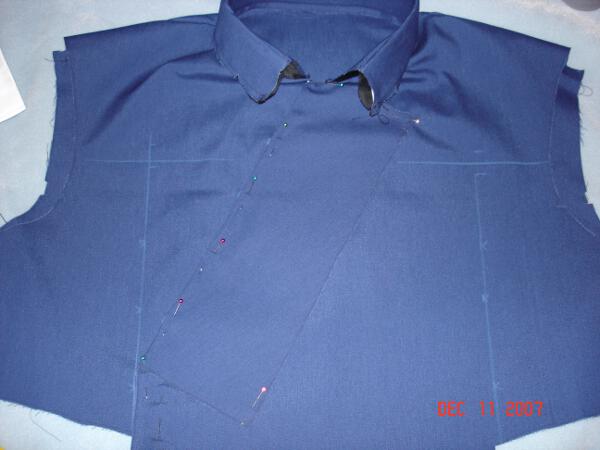
Fig 26: First test fitting with the collar. Again, pretty much stock from the pattern, but with two key changes. One, I cut straight lines where the pattern curved. Two, I basically cut the pattern out double. I made -two- collars, sewing one to the coat, sewing the other to first, top to top. It will make more sense later.
Fig 27: Another view of the 'two' collars.
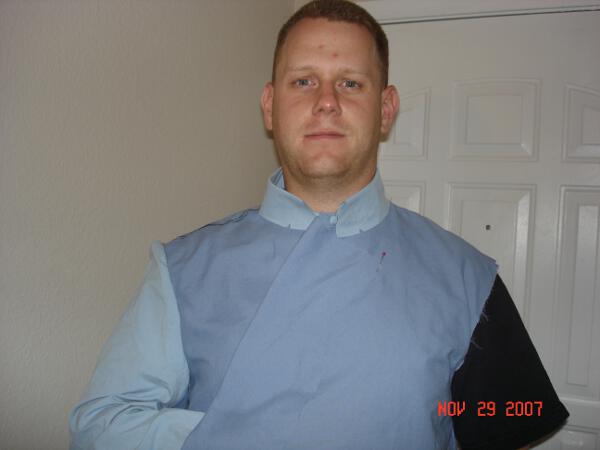
Fig 28: Sacre' Blu! View of front of coat, one arm, and collar.
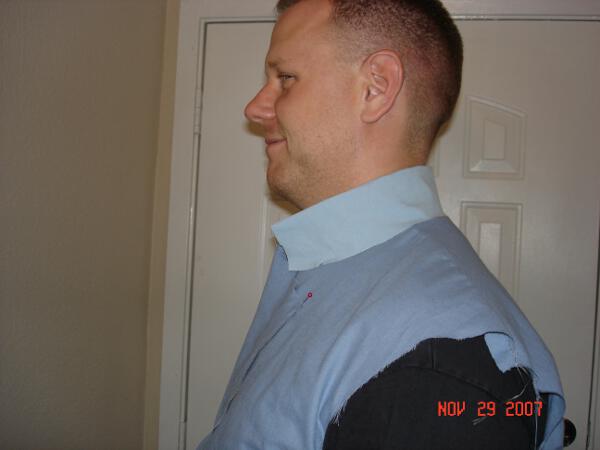
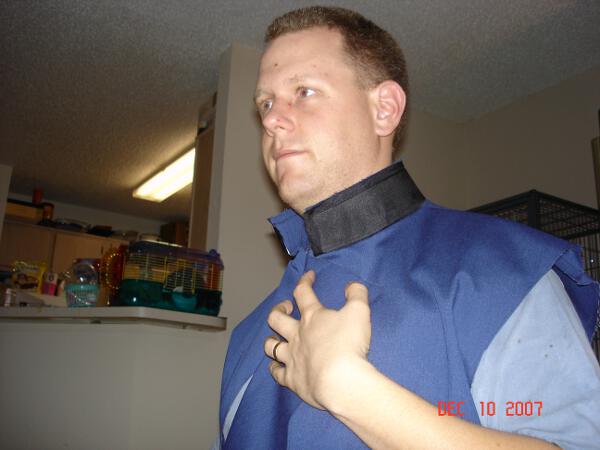
Fig 29: Side view of collar, and me smiling like a goon.
Fig 30: This is the pattern piece for the underside, my right hand side. This piece didn’t need as many adjustments as the left piece. Just enough left up front for seam allowance. I temporarily stitched it in place first but later (as in 2 years later) added a zipper along the diagonal, with a hook / eye at the collar.
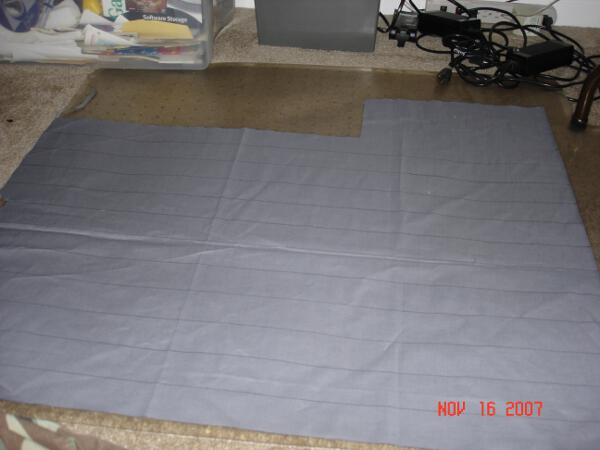
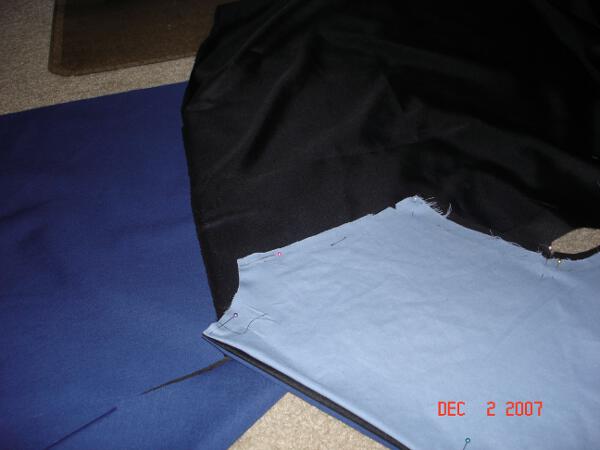
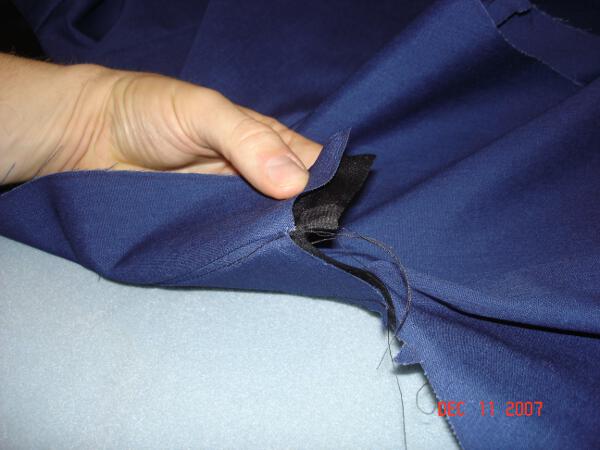
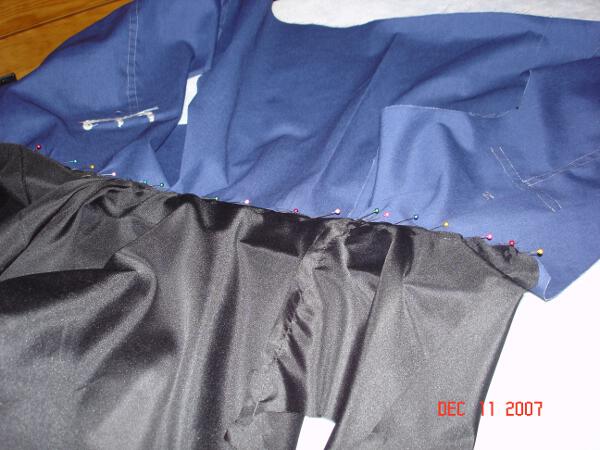
Fig 31: Here you see three pieces of fabric: the light blue (the mock-up). The black (the lining to give it more of a ‘jacket’ feel. And the dark blue (the jacket itself). I pinned the mock-up to both the lining and the fabric at the same time, and cut them together, using the mock-up as a pattern. This made sure my lining and fabric were the same size and shape. Be careful with right and wrong side of fabric.
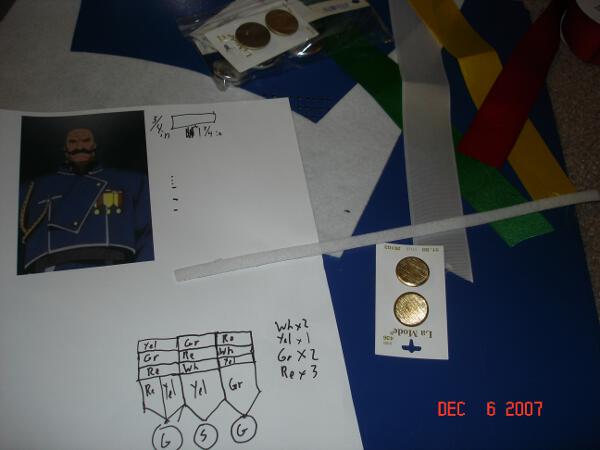
Fig 32: Planning out the ribbon layout as to not have too many of the same colors near one another. The long, white strip is extra-uber-heavy-duty interfacing. I’ll be wrapping the ribbon around this and securing it with hot glue designed for fabric. I wrapped the ribbons vertically, giving it a more authentic look and feel (this is how US Military ribbons go). I wound up using different buttons for his medals.
Fig: 33: Glued one end to back. Wrapped it around. Glued the second end on top of the first. This entire strip will be glued to another backing piece of interfacing.
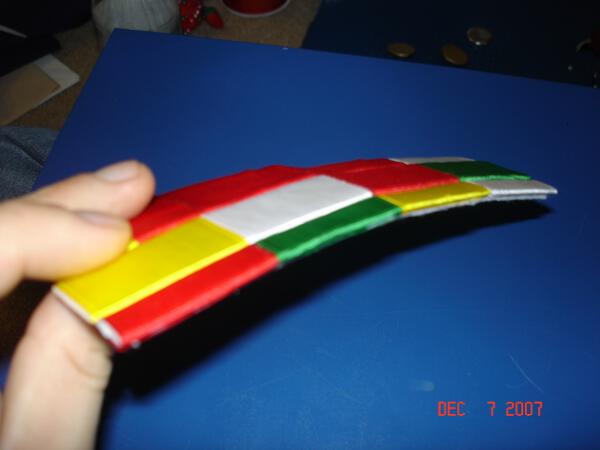
Fig 34: If I'm writing my own awards, might as well write myself as many as I want. :3 These got the buttons (after I took the Dremel to them). The left one is just a yellow and red ribbon sewn together and ironed open (on Synthetic heat setting). Again, glued to another stripe of interfacing.
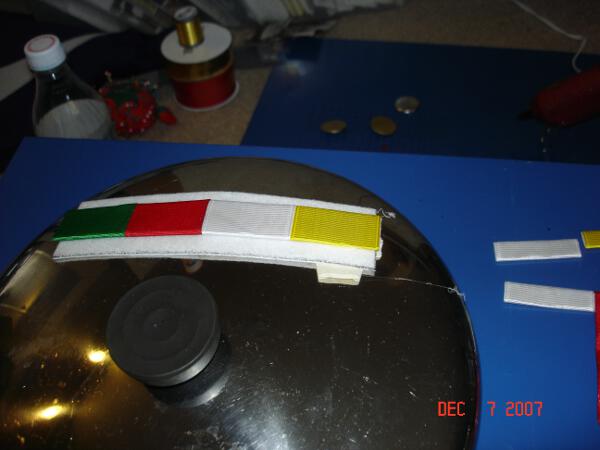
Fig 35: The Human chest curves. Be you either fat, thin, tall, short, male or female. Noone is built like the people from Katamari Damacy. I'm a bigger guy, so I curve a bit more across the chest. By taping the back piece of interfacing to a pot lid, I gave the top piece (with the ribbons on it) a curved section to glue onto. It held the curve after removal. This worked for me. You may decide your medium depending on your frame / size. This is probably the most expendable detail, but it adds, IMHO.
Fig 36: Perspective! This is the top edge.
Fig 37: Again, these pictures are out of chronological order. I was really into my work. I had already measured out the widths of the rank stripes (Why not promote myself to General?) I wiki'd the rank structure. The narrower stripes are the same ribbons as the wide one, but folded in half. If you're doing a specific character, please check this.
Fig 51: How I measured the rank stripes for the epaulets. I made a mistake or 2 here, but got it right eventually.
Fig 52: Measuring and folding the ribbon. I picked the color that matched the US Army color. My rope braid is also the same color.
Fig 53: here are two sets of epaulets. A fine example of “4dimensional sewing”, I measured the first set exactly. When I went to attach them, they were three inches too short. I did not repeat this error. The second set was four inches longer than needed. I sewed the neck side down with the same hand sewing used to attach the gold shoulder button.
Fig 54: Another view of the epaulets.
Fig 55: I attached the epaulets in the same seam that the sleeves used. Inside view.
Fig 38: I never did get around to sewing the stars on. Note the blue dashes at the end of the fabric: this is how I marked both the size and placement of the gold stripes.
Fig 39: The collar was easier than I thought it would be. I really just made two copies of the collar from the Civil War pattern, and sewed them together at the top edge. Note the white strip of heavy interfacing. It went in-between the pieces of collar fabric, sorta like the thingy Catholic Priests wear inside their collars. NOTE, I made the interfacing stripe inside smaller to compensate for SEAM ALLOWANCES sewn on the collar. Trust me, trying to sew through more than one layer of this Heavy interfacing will lead to more cursing. And you don't need to sew through it anyway.
Fig 40: ½ of the collar attached. Lined with black lining material. I had begun to run out of blue fabric (that's my official story. My Unofficial story is that I messed up). The heavy interfacing makes it stand right up. You can test fit the heavy interfacing by only sewing the long seams of the collar and sliding the interfacing in. If it don't fit, trim it a tiny bit.
Fig 41: Magic happened. Seriously, I pinned together four separate layers of fabric here, folding two along seam allowance, in on themselves. Imagine making a Heart shape with your hands; those are the outer two layers of fabric. Then slide two sheets of paper between your knuckles; those are the two layers of the top collar fabric. It's tough to explain..
Fig 42: ...but it produced a nice, clean top edge of the collar.
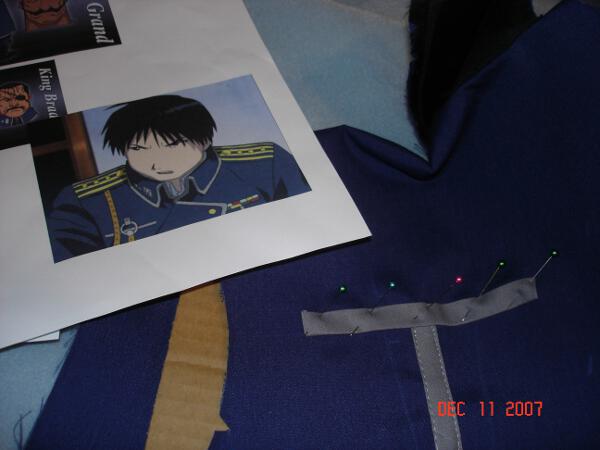
Fig 43: I measured out where the gray lines would go (using the ref pic my wife made me). I Did Not Get It Right The First Time. Note there are SEVERAL little blue X's. I marked them, then tried the coat on, to see if the lines went straight across and up and down.
Fig 44: The lines were straight and level when the uniform lays flat, and is not worn... when worn, they tilted.
Fig 45: I adjusted the lines several times, and surface stitched them down. Them being lengths of the 'bias' tape I made.
Fig 46: I folded a tiny tab in half, sewed it down, and ran a Keyring through the tab. Voice of Experience; take this keyring off when washing.
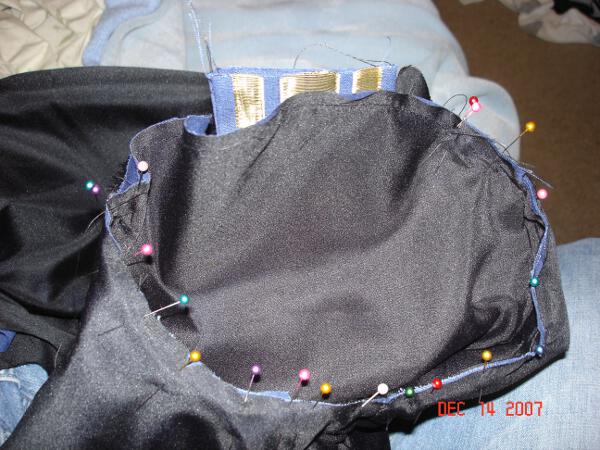
Fig 47: After I sewed the gray lines down, I got the lining ready. It's held in place by the gray bias tape seams. Only a few places required their own stitches (like the armhole seams)...
Fig 48: ...and the collar seam. This makes it much more comfortable to wear if you're going the 'black underarmour shirt' route.
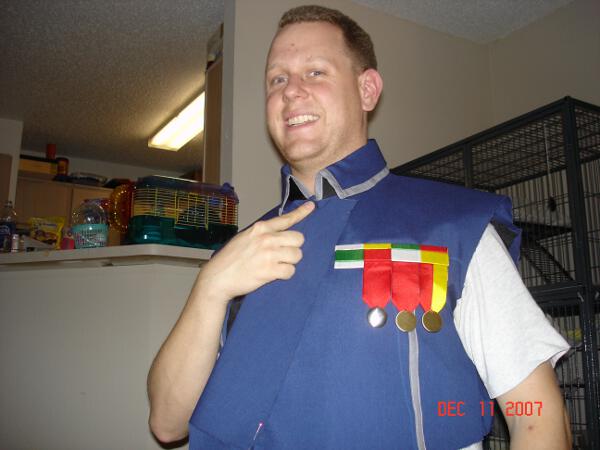
Fig 49: I'm starting to look like a (highly caffeinated) Alchemist! Here is where I sewed my first lengths of 'bias' tape. I did NOT curve the tape around any 90 degree angles. I cut it, folded it under, sewed it, and started at the same corner with another folded under piece. I recommend a thick needle, slow sewing, and lots of patience and care... but it does make for clean, hard corners. :3
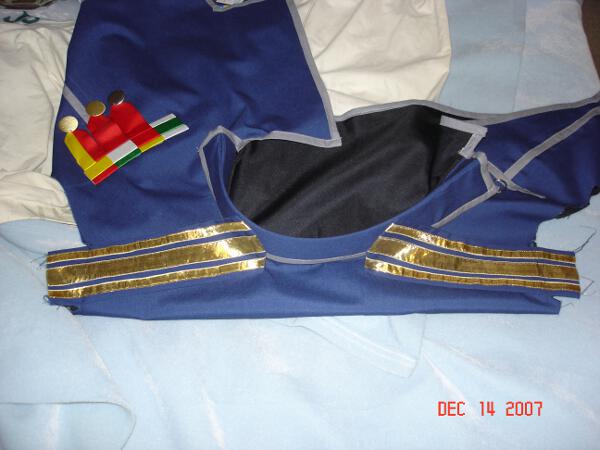
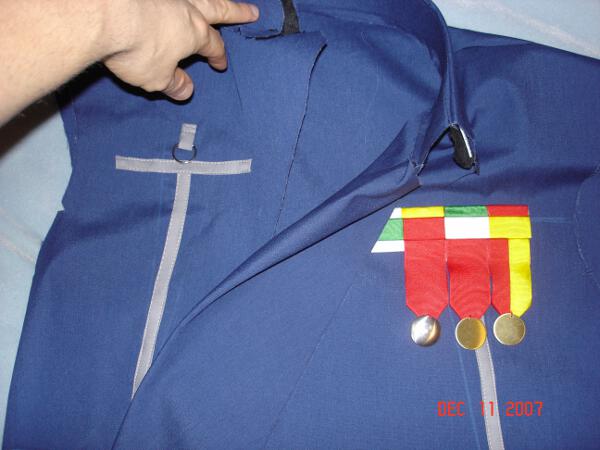
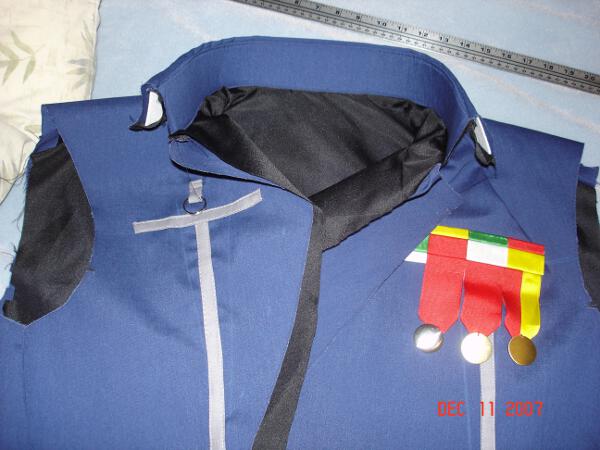
Fig 50: Everyone's got a little Captain in... nevermind. More tape added to the edges. A slight error can be seen on the right side stripe under the medals. It does not align to the bottom flap as I would have liked.
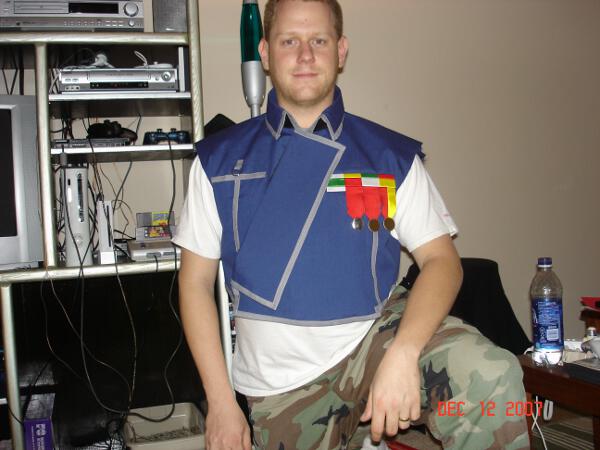
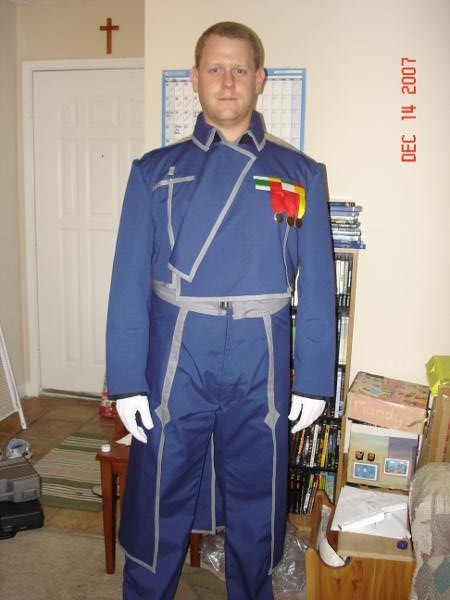
Fig 56: First test fitting of almost everything. Pants tutorial is on its way.
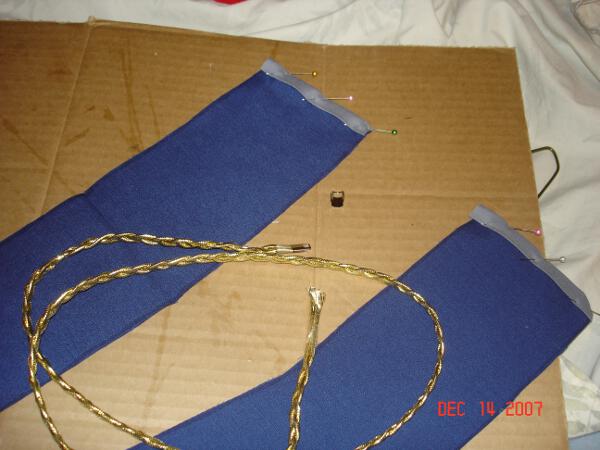
Fig 57: My wife braided 3 cords together. I couldn't find a pre-fab braid that matched. I believe these are arm cuffs...
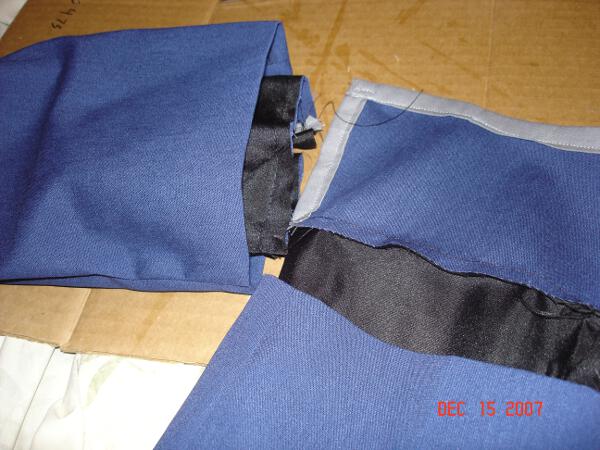
Fig 58: I sewed the cuffs onto the end of the sleeves, attaching it to the lining then the jacket fabric. That's it for the top. Pants to follow! BACK to Cosplay |