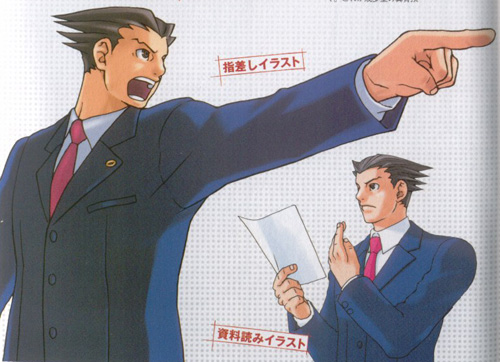
"Reverse Wig Styling"Kind of strange title, isn't it? How you do "reverse" style a wig? The answer - you don't style a wig at all - you essentially build one from the ground up! Let me back up for a moment. Advanced wigstyling techniques involve starting with a regular wig, then adding foamcore (like styrofoam or funfoam pieces) and extensions to achieve a specific style. With "reverse" wig styling, I started with a foam sculpture, then added all the hair to it piece by piece before styling. Not the easiest thing in the world, but I could think of no other way to get this style. This project started out with trying to replicate a very unusual and very difficult hair style - Phoenix Wright's hair.
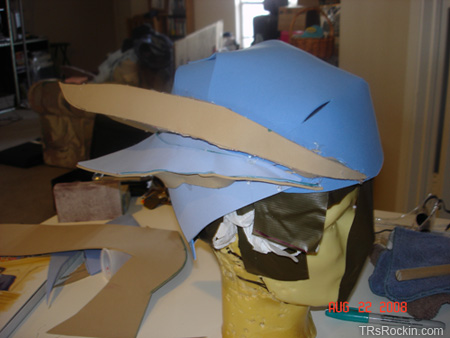
As you can see, he has very specific spiked shapes to his hair that go straight back. I've seen people attempt this style with regular wigs and it never quite looks correct. Usually it just looks like a mess of windblown hair rather than individual spikes. My husband, who hates wearing wigs, developed a technique to make Phoenix's hair entirely out of fun foam. We placed a grocery bag on his head and I wrapped it around with duct tape to get a replica of his head size and shape. He has a rather large head, so we knew that a regular styrofoam wig head would be much too small.
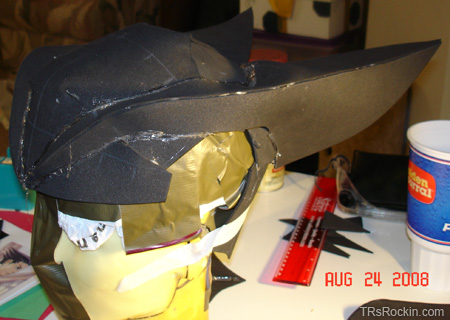
He took a lot of time to put together Phoenix's hair from individual pieces of fun foam, first making a mockup out of construction paper and then a second mockup out of fun foam before crafting the final one out of black fun foam, holding the foam together with hot glue. When it was finished, he spray painted over the entire thing with black paint to hide the glue spots. Later, I tried to use the same technique for my College Phoenix hair, but it didn't turn out quite as well. I didn't have the time to make several mockups, so my hair wasn't made from long, continuous pieces of fun foam. Rather, there were some places were pieces were patchworked together. In certain lighting, it looked kind of bad. And no matter what you do, this always looks like foam. There is no mistaking it for real hair. But that's when I got an idea. I remember seeing a photo on Katie Bair's website where she had built a foam structure underneath a Ryoko wig, and she attached the hair to it for those big crazy spikes. She did actually have a full wig plus extensions that went over the foam, but I was thinking that maybe I could try this idea as well. Katie recommends using caulk rather than hot glue to attach fibers to foam pieces, so I picked up a tube of clear drying caulk (the same stuff you'd use for tile work) in the hardware aisle of Wal-Mart. I had some extensions left over from my Maya wig, but then I ran out (and lost some of them) so I picked up a second pack from Sally's Beauty Supply. The first set I had were a "silky" kind, but the new ones were a "yaki" lightly textured. I wound up covering over all the original extensions with the new ones so they would match.
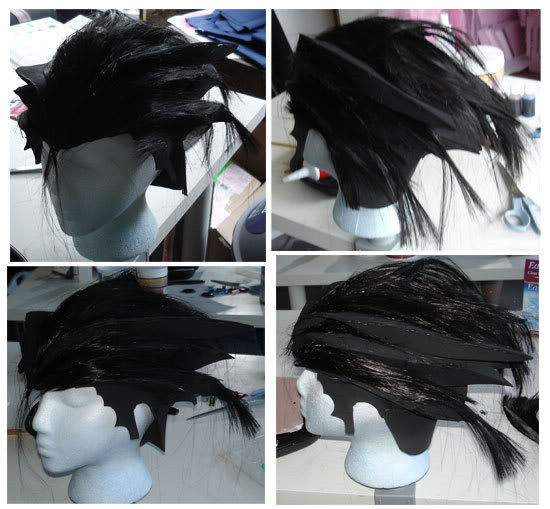
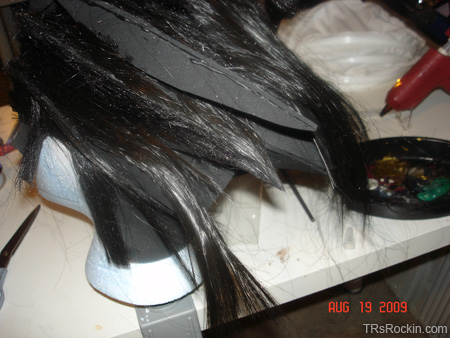
The first attempt I made was to spread the caulk on the foam with a plastic spreader, and then smooth the loose extension hair over that. I had limited success. Some of the fiber seemed to hold ok, but a lot of it fell off. And it looked kind of uneven. Since I didn't plan to use this costume for a while, I let this sit for months without working on it. Months later, I acquired the second pack of extensions and tried something a bit different with the caulk. I squeezed it out directly into my hand rather than on a tray, and used my fingers to apply the caulk. Instead of putting the caulk on the foam, I spread the extension hair over the foam piece and liberally applied the caulk directly on top of the hair. This worked a lot better, especially for cementing the cut ends of the hair down. It also gave the hair a slightly glossy look, like a lot of hair product had been used. And to be honest, if you got your hair to look like this naturally, you would have to use a lot of product.
Because the caulk was quite sticky (and didn't really set until totally dry), I could only work on this in sections. Trying to do two close together sections at a time proved ineffective, as a lot of the first section of hair would start pulling up as I worked on the next. I found myself doing the side spikes first, alternating back and forth from the right to the left side of the head.
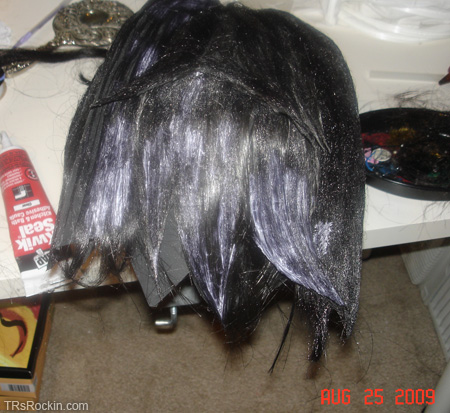
The top section had a different challenge, as the foam was built in shelves to give depth to the hair. The top piece was easy, but tucking the hair underneath for the bottom layers required more time and a lot more caulk.
When I added the hair to the foam, I usually left it a bit longer than I needed and trimmed off the extra once the caulk dried.
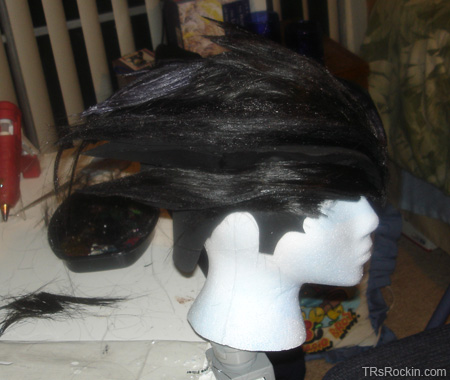
Making the points on the spikes was done after the hair on the top and bottom of the spike was set in place and dry. I trimmed the loose hair into a rough point shape, and sculpted the point by pinching the pieces together with more caulk. I had to go back and re-pinch the pieces as they tried, since the hair kept coming apart.
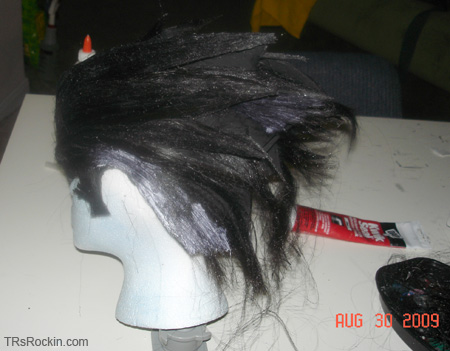
The last section I worked on was the back of the head. I was never happy with the bottom neckline piece of the foam as it looked very rounded and fake. I left a longer fringe of hair long the bottom edge, and it looked a lot better. I arranged the hair to go up the back of the head vertically, so it would look more like hair brushed up into the weird style. Finished hair!
BACK to Cosplay |